
Affiliate disclosure: Some links on this page are affiliate links. As an Amazon Associate we earn from qualifying purchases, at no extra cost to you.
The short answer: spalling concrete (a surface that flakes, pits or pops off in chips) is usually caused by water freezing inside the top layer of the slab, made worse by deicing salts. You can fix shallow spalling yourself by cleaning off all loose material and applying a cement-based resurfacer, patch deeper holes with a repair mortar first, and then protect the repaired surface with a penetrating sealer once it has cured. If the concrete underneath is soft, crumbling or cracked through, resurfacing will not last, and the slab needs professional repair or replacement.
What Is Concrete Spalling?
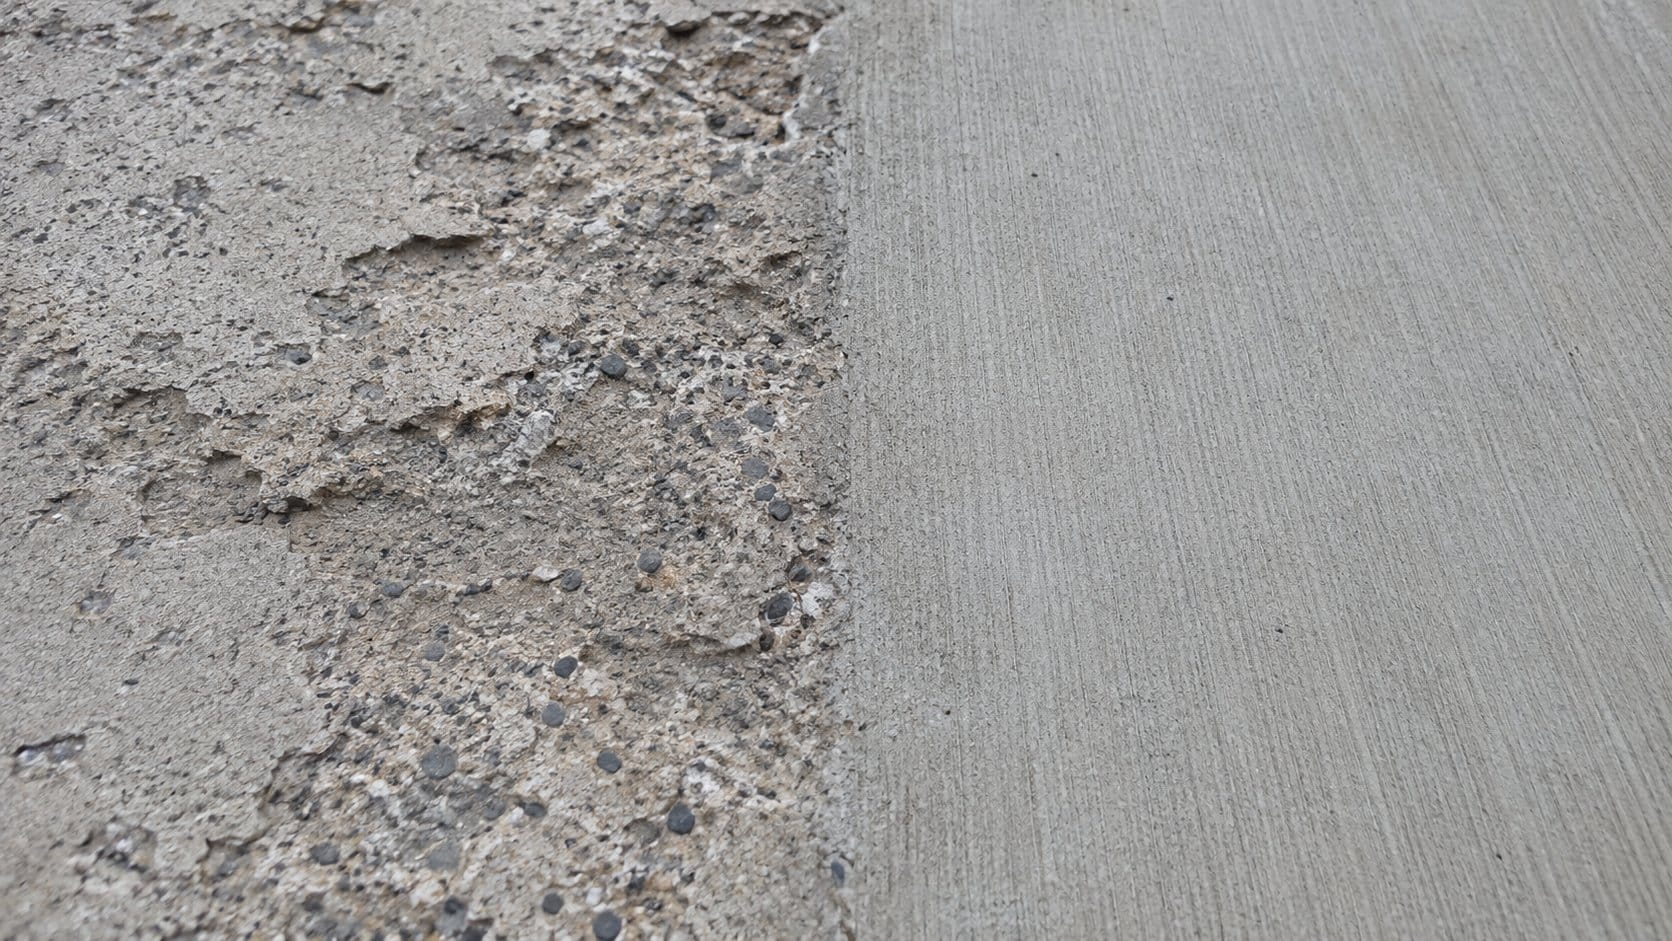
Spalling is when part of a concrete surface breaks, chips or peels away. You will often hear it called “scaling” when the damage is a thin, flaky layer coming off, and “spalling” when deeper chips or craters break out. The two words are used loosely, and the repair is similar. It shows up most on driveways, sidewalks, steps, garage aprons and pool decks, anywhere that gets wet, freezes and sees salt.
What Causes Spalling?
- Freeze-thaw cycles. Concrete is porous. Water soaks into the surface, expands as it freezes, and over many cycles that pressure breaks the top layer apart.
- Deicing salts. Salts pull more water into the surface and add more freeze-thaw cycles, which amplifies the damage. Industry guidance warns never to use deicers containing ammonium sulfate or ammonium nitrate on concrete, and notes that magnesium chloride and several other chemicals have been linked to higher deterioration rates than sodium chloride or calcium chloride.
- Salt in the first year. Deicers should generally not be used on concrete less than a year old, while it is still gaining strength.
- Finishing and curing problems. Working the surface while bleed water is still present, adding water to the surface, or letting a late-fall pour freeze before it cures all create a weak top layer that spalls easily.
- Mix problems. A high water-to-cement ratio or too little air entrainment leaves concrete with less resistance to freeze-thaw damage. For winter-exposed concrete, industry guidance calls for at least 4,000 psi, a maximum water-to-cementitious ratio of 0.45 and 5% to 7% entrained air.
Step 1: Decide How Bad It Is
| What you see | Likely fix |
|---|---|
| Light flaking, exposed sand or small pits, concrete underneath is hard | Clean and resurface with a thin cement-based resurfacer |
| Scattered holes or chips deeper than about 1/2 inch, solid concrete around them | Patch holes with repair mortar, then resurface |
| Exposed or rusting rebar, wide cracks, crumbling or soft concrete, large sunken sections | Get a concrete contractor to assess repair or replacement |
A simple test: scrape the damaged area hard with a screwdriver or chip at it with a hammer and cold chisel. If the concrete below the damage is hard and does not keep crumbling, it is a good candidate for a DIY resurface. If it keeps flaking away the deeper you go, a thin overlay will just come off with it.
Step 2: Wait for the Right Weather
Cement-based repair products need warmth to cure. Quikrete’s data sheet for Re-Cap Concrete Resurfacer, a common home-center option, calls for air and concrete surface temperatures between 50°F and 90°F. Its FastSet Repair Mortar should not be applied below 40°F or when temperatures are expected to drop below freezing within 24 hours. In much of the country, that makes a November repair a spring project. Use the cold months to protect the slab and plan the fix for when nights stay well above freezing.
Step 3: Remove Everything Loose and Clean the Slab
Bond is everything. Scrape, chip or grind away all loose, flaking concrete until you reach sound material. Remove paint, oil, algae and mildew. Quikrete’s resurfacer instructions call for pressure washing at 2,500 psi and describe this step as essential for a proper bond. Note that the resurfacer is meant for bare concrete, not painted or sealed surfaces, so if your slab has an old film-forming sealer on it, that has to come off first.
Step 4: Patch Deep Spots First
Re-Cap is rated from a feather edge up to 1/2 inch total, built in layers of no more than 1/4 inch each. Anything deeper should be filled first with a repair mortar. For a product like FastSet Repair Mortar, Quikrete’s directions are to chip holes back to sound concrete, dampen the hole with clean water (no standing puddles), press a thin first layer in with firm trowel pressure, then build up to the surface. Its data sheet lists an initial set of about 20 minutes, so mix only what you can use in about 15 minutes. Let patches cure before you resurface over them.
Step 5: Resurface the Slab

- Soak the slab with water, then remove all standing water so the surface is damp but not puddled (called saturated surface dry). Pay attention to low spots.
- Mix the resurfacer to the consistency the label describes for your tool. Re-Cap has roughly 20 minutes of working time at 73°F, so work in manageable sections and keep existing control joints open.
- Spread it with a long-handled squeegee for a thin coat (about 1/16 to 1/8 inch) or a trowel for a slightly thicker coat (up to about 1/4 inch). Quikrete estimates one 40 lb bag covers about 65 square feet at 1/16 inch.
- Broom the surface lightly for slip resistance if it is outdoors.
- Add an optional second coat if needed, staying within the 1/2 inch total.
Step 6: Cure It Properly
Curing is where a lot of DIY repairs fail. Quikrete says to start moist curing once the surface is hard enough to take a gentle water mist and to keep it moist for 24 to 48 hours. Protect it from rain for at least 8 hours. Its data sheets list foot traffic after 6 to 8 hours (depending on the sheet version) and vehicle traffic after 24 hours. Always follow the label on the bag you buy.
Step 7: Seal to Prevent It Coming Back
Because spalling is a water-and-salt problem, a penetrating sealer is your best long-term defense. Industry guidance says silane or siloxane penetrating sealers give the highest resistance to deicer and freeze-thaw damage, and water repellents designed for concrete also help. They soak in rather than forming a peel-prone film. Compare options in our roundups of the best silane/siloxane concrete sealers and best penetrating concrete sealers.
Timing matters: many sealer labels require new cement-based material to cure for a set period before sealing, and that period varies by product. Check both the resurfacer and the sealer labels, and if they disagree, call the sealer manufacturer before you apply.
How to Prevent Spalling This Winter
- Shovel early. Less snow and ice on the slab means less meltwater soaking in and less salt needed.
- Pick deicers carefully. Avoid anything with ammonium nitrate or ammonium sulfate, use the smallest amount that works, and consider sand for traction. See our guide to the best deicing salt for concrete.
- No salt on new concrete. Skip deicers for the first year after a pour or a major repair.
- Fix drainage. Redirect downspouts and fill low spots where water pools and freezes.
- Reseal on schedule. Penetrating sealers wear over time. Follow your sealer label for the recoat interval.
FAQ
Can I seal over spalled concrete without repairing it?
A penetrating sealer can help slow further damage on lightly scaled concrete that is still sound, but it will not restore the surface or fill pits. If the surface is still flaking, remove the loose material first, or the sealer will simply go with it.
Can I repair spalling in cold weather?
Usually not with standard cement-based products. Re-Cap calls for 50°F to 90°F air and surface temperatures, and FastSet Repair Mortar should not be applied below 40°F or when a freeze is expected within 24 hours. Plan the repair for a warm stretch or for spring.
Is spalling a structural problem?
Surface scaling on a driveway or walkway is usually cosmetic at first, but it gets worse each winter as more water gets in. Spalling that exposes rusting rebar, or appears on steps, retaining walls, balconies or foundations, should be looked at by a professional.
Summary
Spalling is water and salt breaking down the top of your concrete. Check that the concrete underneath is sound, remove everything loose, patch deep holes, resurface in warm weather, cure it carefully, then protect it with a penetrating sealer and smarter deicing habits. If you see exposed rebar or crumbling concrete, call a pro instead. For more on choosing a sealer for outdoor slabs, see our concrete driveway sealer buyer’s guide.


